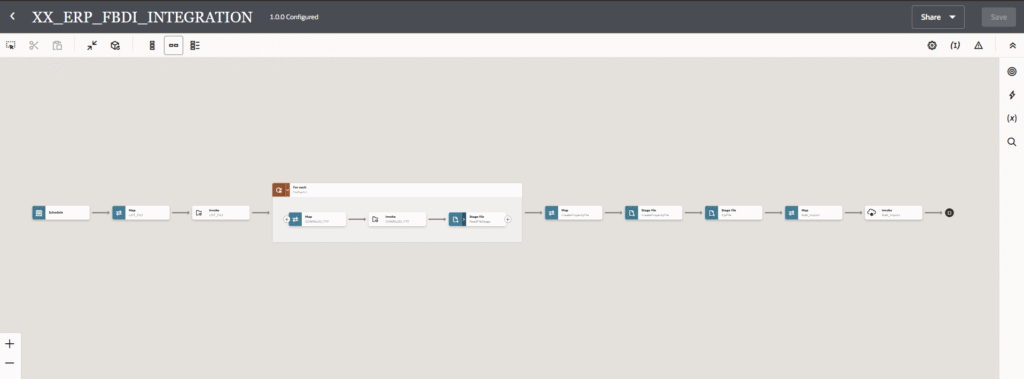
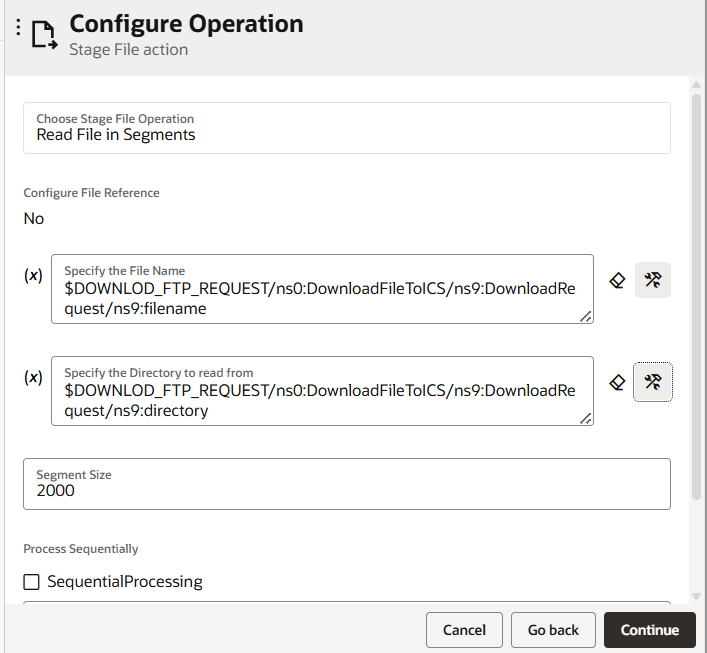
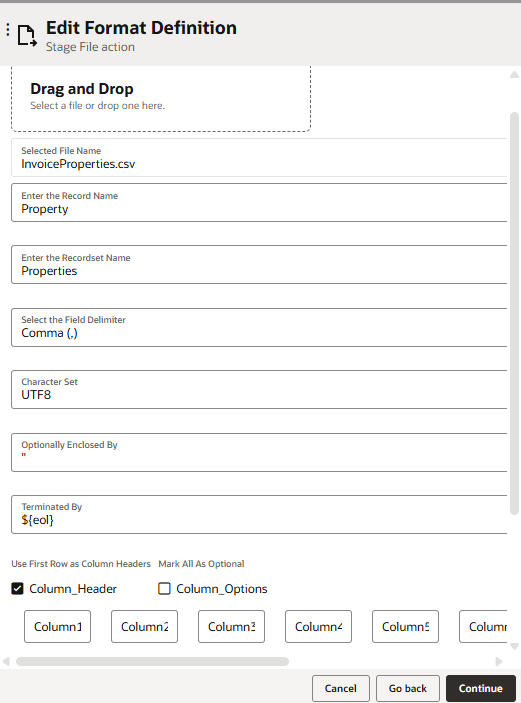
Step 4: Stage File activity and choose the Write File operation. In this wizard we will generate the FBDI file on the Stage.
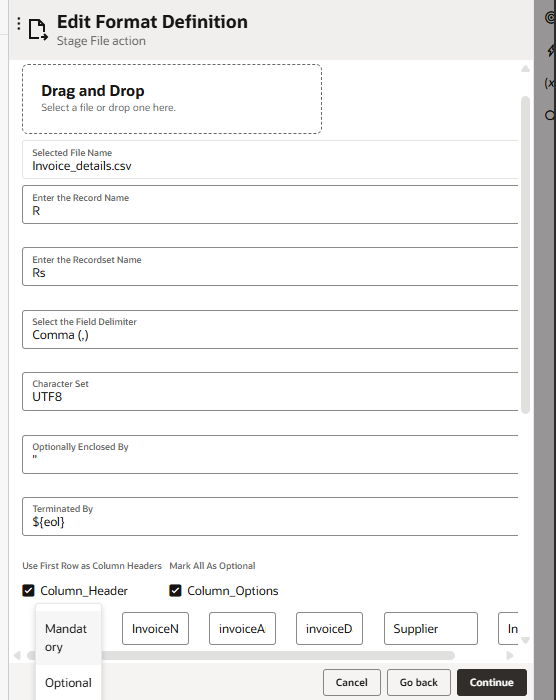
- Select the sample file in the Stage File activity and complete the wizard
- Map the required fields
Step 5: Create the Job Properties file Zip the FBDI and property file
To perform the FBDI bulk data import operation, you need to create a Job Properties file that provides the ERP system with details about the data to be loaded. This properties file contains essential information such as the job definition, package name, and job parameters for the imported object.You must generate and include this Job Properties file as part of the ZIP file. The properties file should be in CSV format with the following structure:
<job package name>,<job definition name>,<zip file prefix>,<Param1>,.....<ParamN>
While the name of the properties file can be anything, it must have the .properties extension. The third parameter in the properties file should match the prefix of the ZIP file. And remaining will be the parameters in sequence as in Import Job.
For example:
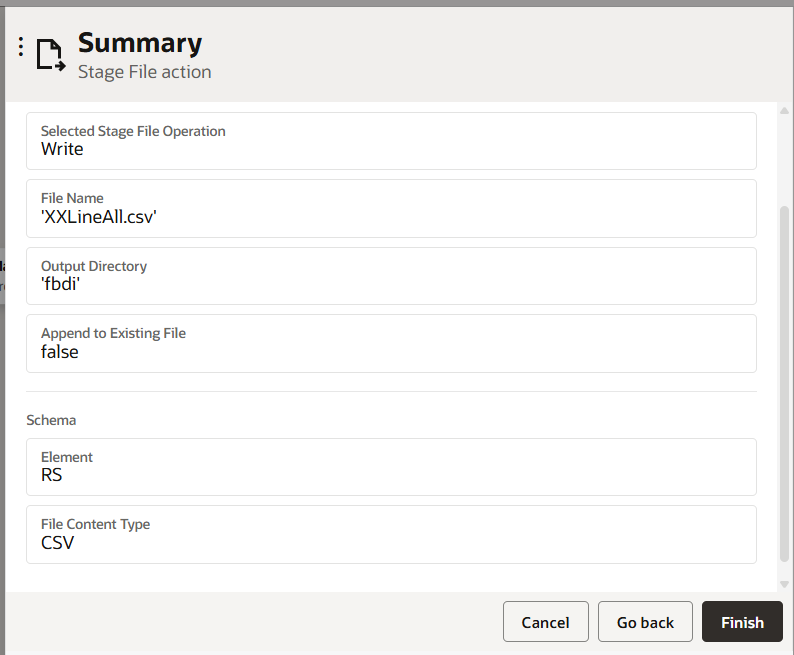
If the ZIP file is named AR_Invoice_20250523021820.zip and contains XXLinesAll.csv and the ARInvoice.properties file, then the third parameter in the properties file should be AR_Invoice.
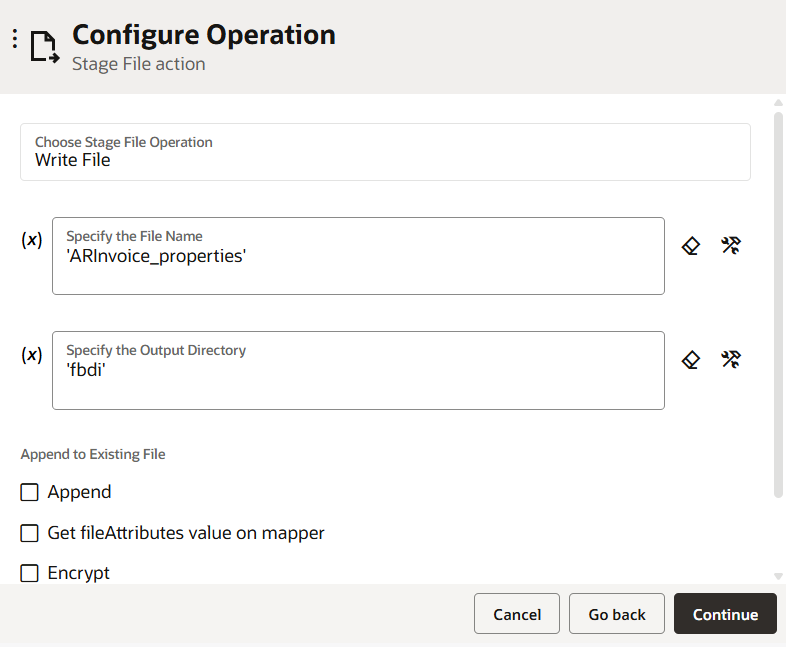
Step 6: Stage File activity and choose Write File operation. Select the sample csv in order to form property file.
Map the property file according to the job package name, definition name, and parameters.
Note: the FBDI and property file must be in same directory as both the files will go in single zip file.
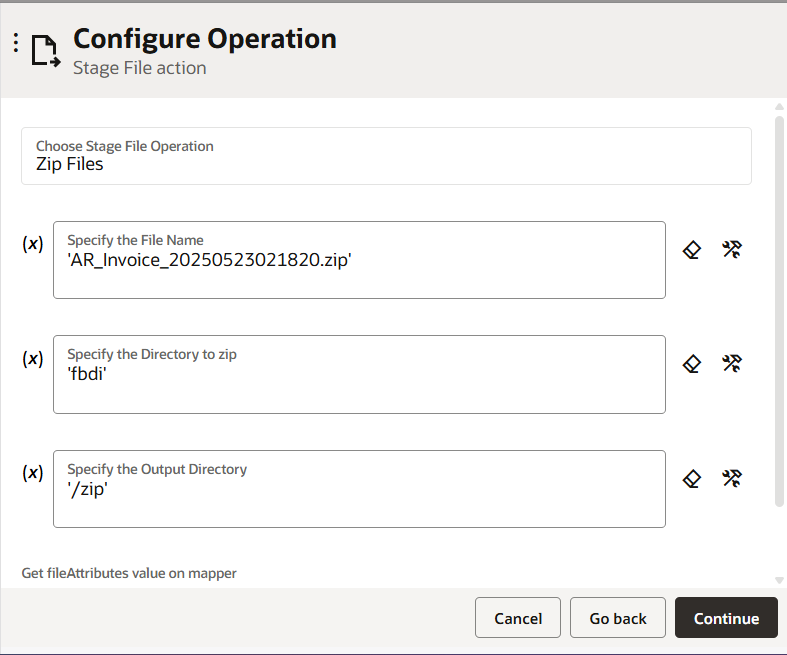
Step 7: Stage File activity and select the Zip Files operation.
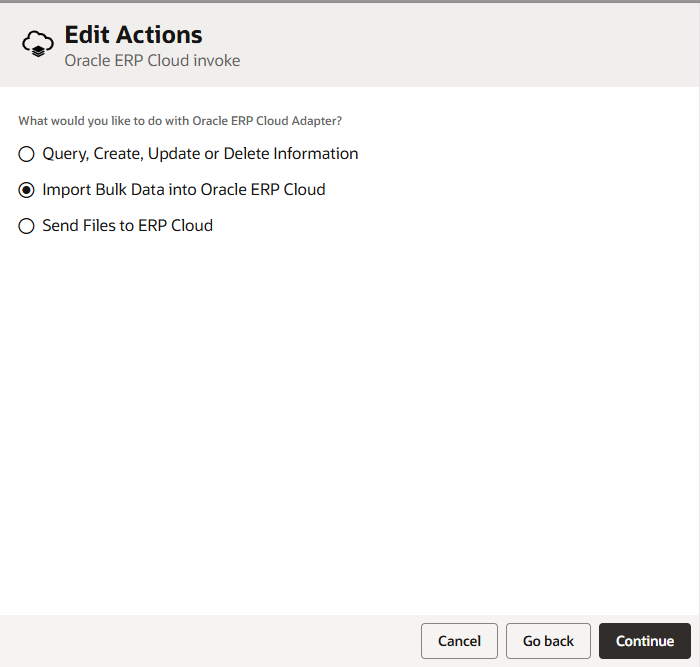
Step 8: Use the ERP adapter to trigger the Bulk Data Import process.
- ERP adapter and select the Import Bulk Data into Oracle ERP Cloud operation.
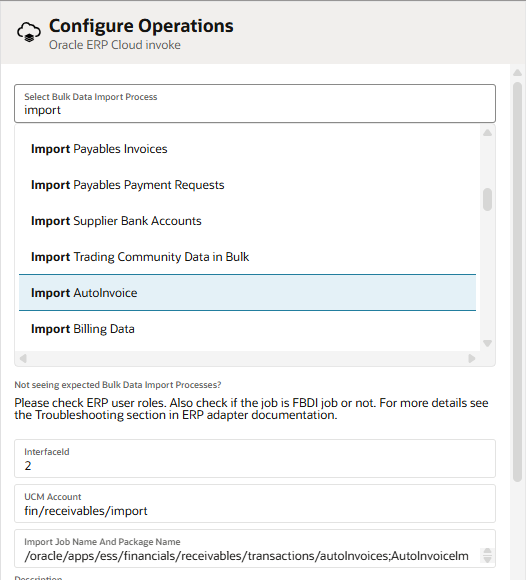
- choose Import AutoInvoice and click the Next button.
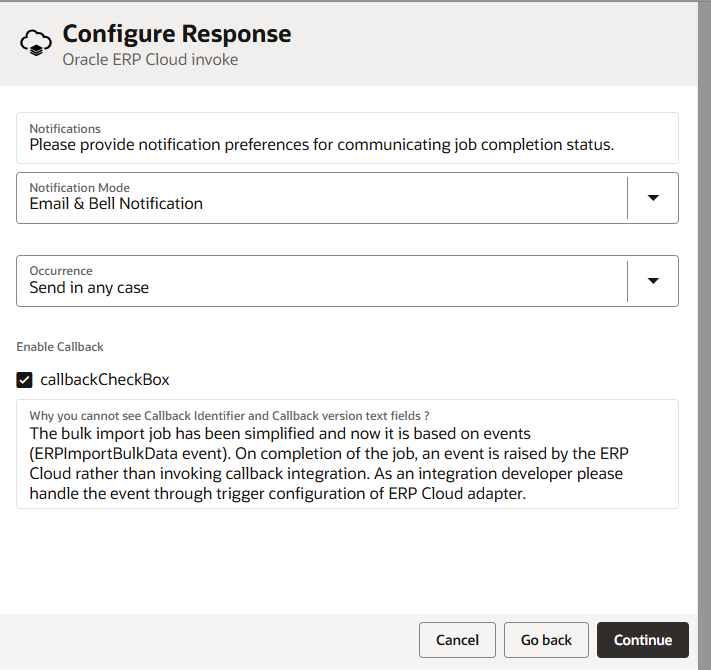
Step 9: Select the Enable Callback option and enter the following details:
- Integration Flow Identifier: ERPCALLBACK
- Integration Flow Version: 01
These are the identifiers for the integration that will receive the callback
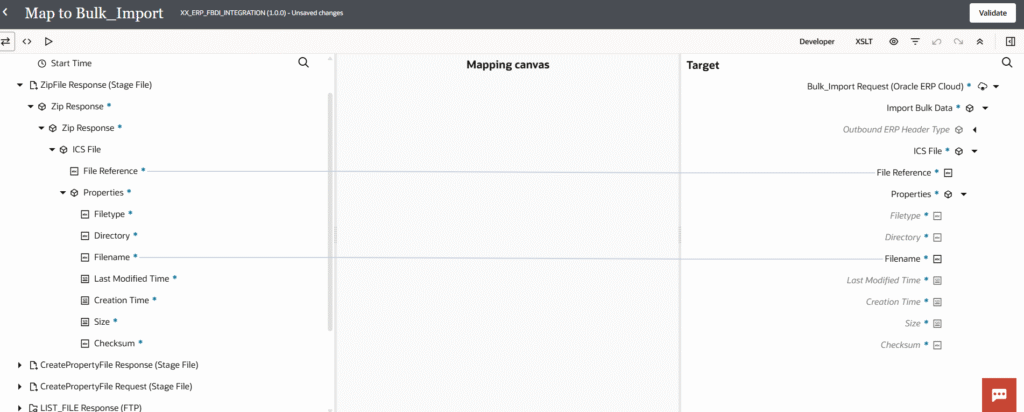
Step 10: Open the mapper and perform the following mappings:
- Zip Files response – File Reference → importBulkData – FileReference
- Zip Files response – filename → importBulkData – filename
- Save this integration and activate.
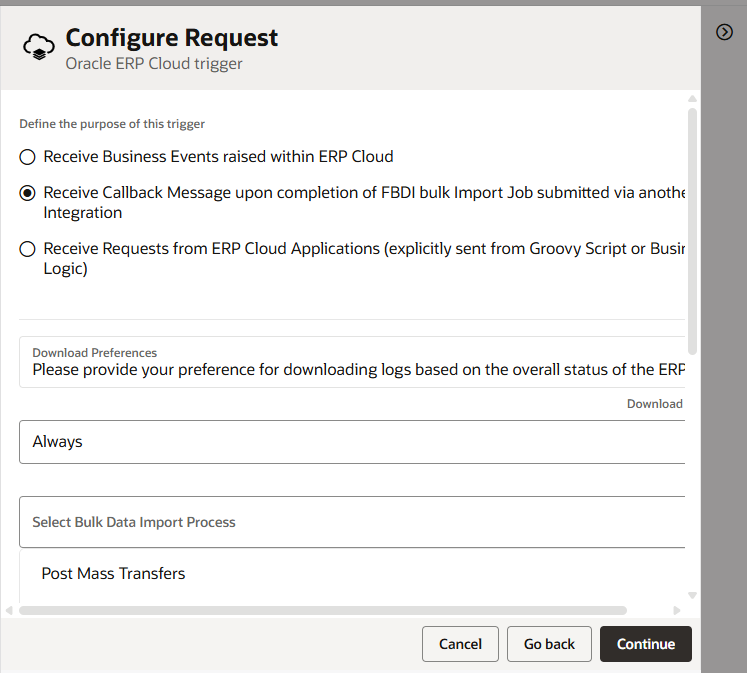
Create a callback integration by setting up an App Driven Orchestration integration. Name it ERPCallBack with version 01.00.0000, ensuring that the identifier is set to ERPCALLBACK, which was previously configured in the ERP adapter.
Add the ERP adapter as the Trigger and select the option Receive Callback message upon completion of FBDI bulk import Job submitted via another Integration. From the dropdown, select Always.
Activate both integrations and submit the XX_ERP_FBDI_INTEGRATION. Once the XX_ERP_FBDI_INTEGRATION executes successfully and ERP has loaded all the files into the system, ERP will send a callback to OIC, confirming that OIC has successfully received the callback.